Light and shadow
Variant i Dynamics first Other Variants Interactive tutorial lecture
This is the first tutorial on geometrical optics. Students develop the ideas that light travels in a straight line and an extended source can be treated as a set of point sources.
Topics Waves and optics / Geometrical optics: limits, models, light (or shadow), ray tracing, and geometrical optics
Materials
Materials by the UW team
- Instructor Guide


- Pretest


- Exam Questions


- Equipment List

Tutorial details
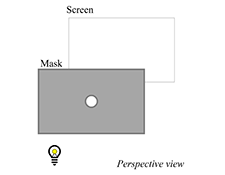
In the tutorial, students predict what they will see on the screen in a variety of situations. They then check their predictions and resolve any conflicts. The first exercises help students to develop, on the basis of observations, the idea that light travels in a straight line. Later exercises help them to recognize that an extended source can be treated as a collection of point sources. Even after students recognized how to think about a long-filament bulb, most have difficulty extending their understanding to a true extended source, such as a frosted bulb. Students are told to ask a staff member for the frosted bulb. Check their reasoning before giving them the bulb.
The tutorial includes a quantitative section in which students determine the sizes of the images produced by light from a small bulb and by a long-filament bulb passing through a small hole. Students in both algebra and calculus-based courses have difficulty with this relatively simple application of similar triangles. Students also examine the effect on the images of halving the diameter of the hole in the mask. Many are surprised that the length of the long-filament bulb is relatively insensitive to the size of the hole when the hole is small. In the final part of the tutorial, students apply their understanding in the complementary context of shadows.
For instruction tips, login or register as a verified educator to see the Instructor Guide.
Equipment
Special Instructions
Equipment preparation:
The flashlights should have small bulbs that can serve as point sources of light. (Maglights work well.) If flashlights are not used, the following can substitute:
- small bulbs in sockets
- batteries
- connecting wire
Instructions to make masks:
Cut a square hole (~2-3 cm) near center of cardboard, Cut a circle (~10 cm diameter) from a manila file folder. Make each of the following holes in the manilla circle (each about half a radius from the center):
- pinhole
- round circle ~0.3 cm diameter (use small hole punch)
- round circle ~0.6 cm diameter (use standard-size hole punch)
- round circle ~1.0 cm diameter (use utility knife)
- small triangular hole (use utility knife)
Fasten the manilla circle to the cardboard with a paper fastener so the square hole in the cardboard lines up with only one of the five apertures at a time.

Instructions to make "shadow box" (1 per group)
- cardboard box with bottom interior surface covered with white paper)
- 1 small bead (~0.5 cm diameter) - can be made of clay
- 1 piece of thread, to suspend bead

Equipment to be handed out by instructor during tutorial:
- frosted bulbs in sockets (be sure bulbs are well-frosted)
- 1 red acetate piece per group
- 1 green acetate piece per group
Note: Each group will need access to an electrical outlet.
List
- long-filament bulbs & sockets
- white board or large sheet of paper with markers
- meter sticks
- flashlights
- power strips
- frosted bulbs
- acetates (red and green)
Research
- P. R. L. Heron and L. C. McDermott, Bridging the Gap Between Teaching and Learning in Geometrical Optics: The Role of Research, Optics & Photonics News 9 (9) 30 (2009).
- K. Wosilait, P. Heron, P. Shaffer, and L. McDermott, Development and assessment of a research-based tutorial on light and shadow, Am. J. Phys. 66 (10), 906 (1998).
Coming Soon! We hope to release the discussion section on each tutorial soon.

